Using your Calendar in FileMaker Pro or FileMaker Go
Server-Powered method.
Once you get the hang of it, using your Server-Powered calendar in FileMaker Pro or FileMaker Go is pretty straightforward. Here are the pieces you’ll need to know:
- You should have already enabled a user with Extended Privileges and set up your data source.
- Make sure you’ve finished setting up your data source in the soSIMPLE Calendar Settings, and especially, chosen the Script to Run as the one you just copied.
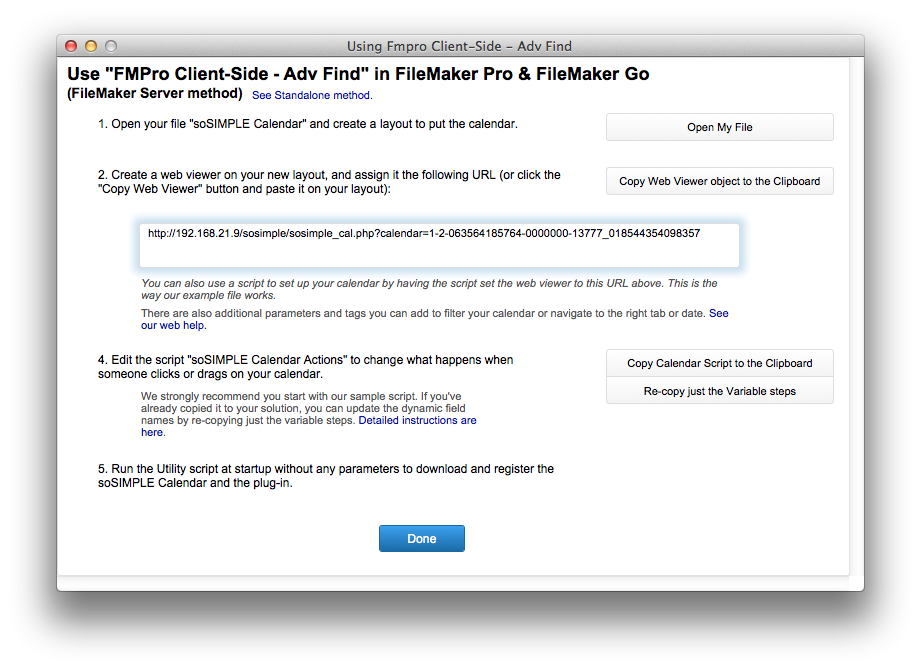
- Copy the default script into your solution
Click the “Copy Scripts” button, then go to the Edit Scripts window in your solution and paste it in. - Copy the web viewer object into your solution
Click the “Copy Web Viewer” button, then create a new layout in your solution and choose Paste from the File menu, while you’re in Layout mode.
- We suggest copying and pasting our web viewer object into your solution. If you don’t, you should remember to anchor the calendar to all four sides of your layout so that it fills the layout, and that you name the web viewer object “web_calendar”.
- If you make any changes to the data source settings, you should click “Re-Copy Just the Variable Steps” and paste these two script steps in the top of the soSIMPLE Calendar Action script.
- You can use parameters to (a) filter your calendar and (b) go to the right date or view by adding parameters to the URL in the web viewer.
- The same calendar that you created for FileMaker Pro can be used in FileMaker Go on the iPad. For iPad use, we recommend setting the Touch Enhancements option on, or adding &cal_touch=1 to your url.
- For FileMaker Go on the iPhone, we recommend the “Mobile” interface, designed especially for that purpose.